Have you ever wondered what the microscopic world looks like? Learning how to use a Foldscope microscope opens up a fun and affordable way to explore it. This paper-based microscope, costing just $2 to make, ensures that anyone can experience the wonders of microscopy. Its lightweight and durable design makes it ideal for beginners, whether you’re at home, in the classroom, or exploring the outdoors. Educators have found that teaching students how to use a Foldscope microscope inspires curiosity and creativity, offering a hands-on approach to science.
With a Foldscope, you can uncover the hidden details of everyday objects and natural samples like never before.
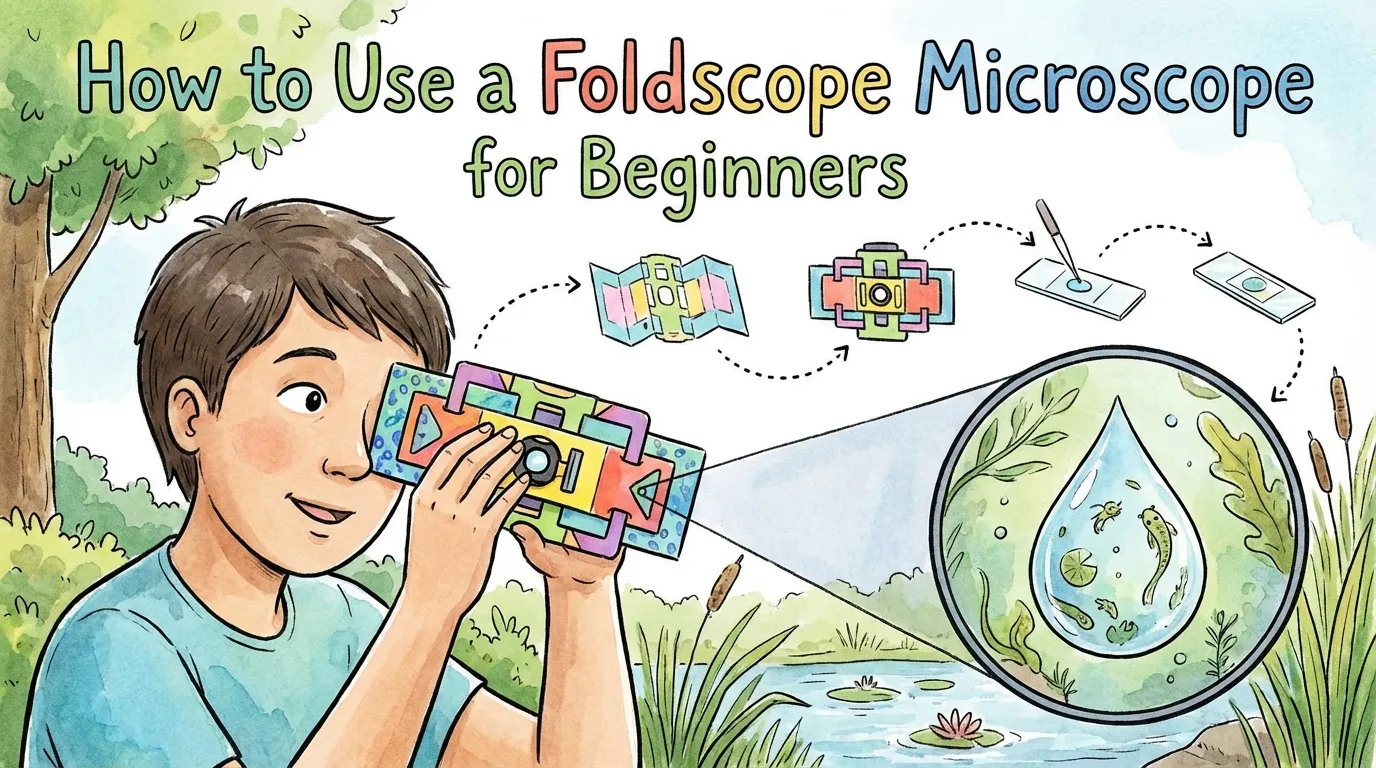
Unboxing and Assembling the Foldscope
What’s Inside the Foldscope Kit
When you open your Foldscope kit, you’ll find everything you need to start exploring the microscopic world. Each component plays a vital role in making this paper-based microscope functional and user-friendly. Here’s a breakdown of what’s included:
|
Component |
Description |
|---|---|
|
Paper Components |
Made of synthetic material, waterproof, tear-resistant, and inexpensive. |
|
Lenses |
Borosilicate glass ball embedded in a circular black plastic piece for magnification. |
|
Light Source |
Essential for illuminating samples in transmissive light microscopy. |
|
Compatibility |
Works with both paper and glass slides, with reusable paper slides resembling playing cards. |
|
Accessories |
Includes a variety of tools for enhanced usability and storage in an embossed metal box. |
These items ensure that your Foldscope is durable, portable, and ready for use in any setting.
Step-by-Step Assembly Guide
Assembling your Foldscope is simple and takes only a few minutes. Follow these steps to get started:
-
Unfold the Paper Components: Lay out the paper parts flat on a clean surface.
-
Attach the Lens: Snap the lens into the designated circular slot. Ensure it fits snugly.
-
Fold the Structure: Fold along the pre-scored lines to create the microscope’s frame.
-
Insert the Light Source: Place the LED light in its holder to illuminate your samples.
-
Secure the Slide Holder: Attach the slide holder to the frame. This will keep your slides in place during observation.
Once assembled, your Foldscope is ready for use. The design ensures stability and ease of handling.
Common Assembly Tips for Beginners
If you’re new to using a Foldscope, these tips will help you avoid common mistakes:
-
Work on a Flat Surface: This prevents parts from slipping or getting lost.
-
Handle the Lens Carefully: Avoid touching the lens directly to keep it clean and scratch-free.
-
Follow the Instructions Closely: Use the included guide for reference if you feel unsure.
-
Test the Light Source: Check the LED light before attaching it to ensure it works properly.
With these tips, you’ll assemble your Foldscope correctly and enjoy a seamless experience.
How to Use Foldscope Microscope with Prepared Slides
Understanding Prepared Slides
Prepared slides are pre-made microscope slides that contain samples ready for observation. These slides often include biological specimens like plant cells, insect parts, or even microorganisms. They are sealed with a cover slip to protect the sample and ensure clarity during viewing. Using prepared slides is an excellent way to start your microscopy journey. They allow you to focus on learning how to use the Foldscope microscope without worrying about preparing your own samples.
When selecting prepared slides, choose ones that match your interests. For example, if you enjoy biology, look for slides featuring plant tissues or animal cells. These slides provide a consistent and reliable way to practice using your Foldscope while exploring the fascinating details of the microscopic world.
Inserting and Viewing a Slide
To insert a slide into your Foldscope, follow these simple steps:
-
Hold the slide by its edges to avoid smudging the sample area.
-
Open the slide holder on your Foldscope and place the slide in the designated slot.
-
Align the sample area with the lens for optimal viewing.
-
Secure the slide by gently closing the holder.
Once the slide is in place, hold the Foldscope up to a light source. Natural sunlight or a desk lamp works well. Look through the lens and adjust the angle until the sample comes into view. This step helps you get comfortable with the basic mechanics of the Foldscope.
Adjusting Focus for Clear Images
Achieving a clear image requires careful focus adjustment. Start by moving the lens closer to the slide. Slowly adjust the distance between the lens and the sample until the image sharpens. If the image appears blurry, try small, precise movements to refine the focus.
For beginners, patience is key.
Practice focusing on different prepared slides to improve your skills. Over time, you’ll develop a better understanding of how to use the Foldscope microscope effectively.
This method serves a dual purpose: it sharpens your capacity for observation and fosters a deeper understanding and admiration for the minute details visible under a microscope.
Creating Your Own Microscope Slides
Materials Needed for Slide Preparation
To create your own microscope slides, you’ll need a few essential materials. These include microscope slides, coverslips, biological stains, and mounting fluid. You can find these items affordably from suppliers like Home Science Tools, which offers pre-cleaned slides, individual coverslips, and complete slide-making kits. Carolina also provides slide preparation kits and storage containers, making it easy to organize your materials.
Having the right tools ensures a smooth slide preparation process. Biological stains, such as methylene blue or iodine, help highlight specific structures in your samples. Mounting fluid keeps your specimens in place and prevents them from drying out.
With these materials, you’ll be ready to explore the fascinating world of microscopy using your foldscope.
Making a Simple Wet Mount Slide
Creating a wet mount slide is a straightforward process. Follow these steps to prepare your sample:
-
Get your sample ready: Suspend microorganisms in saline or nutrient broth, or use lactophenol cotton blue for fungi.
-
Add the medium: Place a small drop of water or the appropriate medium in the center of the slide.
-
Place the sample: Use tweezers or a pipette to carefully add your sample into the drop of fluid.
-
Position the coverslip: Hold the coverslip at a 45-degree angle and gently lower it onto the sample to avoid air bubbles.
-
Remove excess liquid: Use blotting paper to mop up any moisture around the edges.
Avoid common mistakes during this process. Lower the coverslip slowly to prevent air bubbles, and seal the edges with Vaseline or nail polish to stop the sample from drying out. Always work with clean equipment to minimize contamination.
Handling and Observing Your Samples
Once your slide is ready, handle it carefully to avoid damaging the sample. Hold the slide by its edges to keep the surface clean. Insert it into your foldscope and align the sample with the lens. Use a light source to illuminate the slide and adjust the focus until the image becomes clear.
Take your time observing the sample. Look for patterns, colors, and structures that stand out. Experiment with different samples to discover the hidden details of everyday objects. This hands-on approach to science not only enhances your skills but also deepens your appreciation for the microscopic world.
Capturing Microscopic Images with a Smartphone
Attaching Your Smartphone to the Foldscope
Attaching your smartphone to the Foldscope allows you to capture and share the microscopic world with ease. Follow these steps to ensure stability and clarity:
-
Place the coupler over your phone’s camera lens. Ensure the silver magnet side faces down toward the phone.
-
Align the phone camera lens with the hole in the coupler’s ring magnet.
-
Use a double-sided ring sticker or tape to secure the coupler to your phone.
-
Bring your phone’s camera close to the Foldscope’s lens. The coupler should magnetically snap into place.
-
If the coupler doesn’t attach correctly, flip it over and reattach it.
This setup ensures your phone stays stable while capturing clear images. Once attached, you can explore samples with precision and document your findings.
Optimizing Camera Settings for Best Results
To capture high-quality images, adjust your smartphone’s camera settings. Start by increasing the brightness to illuminate the sample clearly. Use the zoom function sparingly to avoid pixelation. Instead, move the Foldscope closer to the sample for better magnification. Switch to manual focus mode if your phone supports it. This gives you more control over the image clarity. Experiment with different angles and lighting conditions to find the best setup. Natural light often works well, but a small LED light can enhance visibility in darker environments.
Practice these techniques to improve your microscopy photography skills.
Sharing Your Microscopic Discoveries Online
Sharing your discoveries online can inspire others to explore microscopy. Platforms like Instagram, Twitter, and Facebook are great for showcasing your images. Use hashtags like #Foldscope or #Microscopy to connect with a community of enthusiasts.
Before posting, edit your images to enhance details. Many smartphones have built-in editing tools for adjusting brightness, contrast, and sharpness. Add captions to explain what the image shows and why it’s interesting. Sharing your work not only spreads knowledge but also encourages others to learn how to use Foldscope microscope effectively.
Exploring the Outdoors with Your Foldscope
Collecting Samples from Nature
Exploring the outdoors with your foldscope is an exciting way to uncover the hidden details of nature. Start by collecting samples from your surroundings. Look for interesting materials like leaves, flower petals, or even a drop of pond water. These everyday items often reveal fascinating microscopic structures. Carry a small container or zip-lock bag to store your samples safely during your outdoor adventure. Some of the most intriguing samples include chalk, fish scales, and kosher salt. Chalk, for example, may seem ordinary, but under the foldscope, it reveals intricate patterns formed by tiny marine organisms.
Kosher salt, on the other hand, appears like ancient temples, sparking curiosity and imagination. Keep an open mind and collect a variety of samples to expand your exploration.
Observing Water, Soil, and Plant Samples
Water, soil, and plant samples are excellent starting points for outdoor microscopy. A drop of pond water can reveal a bustling world of microorganisms, including algae and protozoa. Soil samples often contain tiny mineral particles and organic matter that showcase unique textures. Plant samples, such as leaf cross-sections, highlight cell structures and chloroplasts. To observe these samples, prepare simple wet mount slides using your foldscope. For water samples, use a pipette to transfer a drop onto a slide. For soil, mix a small amount with water to create a suspension.
Plant samples can be thinly sliced to ensure light passes through.
Once prepared, insert the slide into your foldscope and adjust the focus to uncover the microscopic wonders.
Encouraging Creativity and Experimentation
The foldscope’s portability makes it perfect for outdoor exploration and creative experimentation. Take it on a nature walk and observe whatever catches your eye. Empower students or friends to assemble their foldscopes and explore samples independently. This hands-on approach fosters curiosity and engagement. Collaborate with others to enhance your learning experience. Work with a Social Studies teacher to map your outdoor space or a Math teacher to create models using microscopic images. You can even write a guide for new users with an ELA teacher. These activities not only deepen your understanding but also encourage interdisciplinary learning.
Let your foldscope inspire creativity and uncover the microscopic secrets of the natural world.
Using a Foldscope microscope offers a transformative way to teach science and explore the microscopic world. This paper microscope, inspired by origami, empowers you to uncover hidden details in everyday objects and natural samples. Whether you’re a student, educator, or curious explorer, the Foldscope experience fosters creativity and curiosity. Foldscope’s impact extends beyond personal discovery. It has revolutionized science education by providing equal access to tools for learning.
For example, students in remote areas use classroom kits to examine soil microbes, analyze water quality, and even study healthcare-related samples. These discoveries connect you to a global community through platforms like Microcosmos, where you can share findings and collaborate with others.
Start your Foldscope journey today. Let this innovative tool inspire you to see the world in a new light and spark a lifelong passion for science.
FAQ
What is the magnification power of a Foldscope?
The Foldscope provides a magnification of up to 140x. This level allows you to observe details like plant cells, insect parts, and microorganisms. It’s perfect for beginners exploring the microscopic world.
Can I use a Foldscope without a light source?
Yes, you can use it with natural light. However, adding an LED light source improves visibility and image clarity, especially in low-light conditions or when observing intricate samples.
How do I clean the Foldscope lens?
Use a soft, lint-free cloth to gently wipe the lens. Avoid using water or cleaning solutions, as they may damage the lens. Keeping the lens clean ensures clear and sharp images.
Are there any resources to help me learn more about Foldscope?
Yes, you can find foldscope tutorial videos online. These videos provide step-by-step guidance on assembly, usage, and slide preparation, making it easier for you to master the Foldscope.
Is the Foldscope suitable for children?
Absolutely! The Foldscope’s simple design and durable materials make it safe and easy for children to use. It’s an excellent tool for sparking curiosity and introducing young learners to science.

